
 |
| First Light |
It's been a month or so since I've blogged so I thought it was time to show you what I've been up to. Since finishing the Sunset at Mohave Point landscape, I haven't wanted to do anything big so I've been finishing up small projects and making a couple more for class projects.
 |
| Adding a border |
I never did finish First Light - a project from my Strip Applique class and as I considered how to finally finish it, I decided I might as well put borders on. You'll notice the quilt was already trimmed on the edges...
I figured there had to be a way to do it, so I started by sewing border strips on the back. I used a scant 1/4 inch seam and sewed a strip on
I figured there had to be a way to do it, so I started by sewing border strips on the back. I used a scant 1/4 inch seam and sewed a strip on
 |
| What is looked like from the front. |
Don't ask me why I'm showing you the pic of the back border strip - I think because I'm figuring this out as I go. Oh I know - so you can see the scant seam.
Anyway, I turned that back strip back and sewed on the front border strip using a 1/4 inch seam. (So the front border strip would hide that seam from the back border strip - see I'm thinking ahead, lol!)
Anyway, I turned that back strip back and sewed on the front border strip using a 1/4 inch seam. (So the front border strip would hide that seam from the back border strip - see I'm thinking ahead, lol!)
 |
| Adding the front border strip |
What you see in the following pic is both border strips pressed to the right so they are in proper position.
 |
| Borders open |
Once the borders were sewn on 2 opposing sides I slipped in a strip of batting and fused it in place using BoNash Bonding agent - a powder I could just sprinkle on both sides of the batting strips and fuse with a hot iron.
 |
| The batting is now fused between the 2 border strips on the sides |
The next step was to do the same thing - sew on the top and bottom border strips -
 |
| Line up the top/bottom border strips - sew with a scant 1/4 inch seam |
Once the top/bottom border strips were sewn in place I tucked batting in between and fused.
 |
| The back of the quilt |
 |
| A corner from the front of the quilt |
 |
| BoNash Powder |
This is a pretty cool powder. I wonder if it could be used to baste small quilts - I'll have to check it out.
 |
| All done |
So, I sell landscape fabric - I have an online store in case you didn't realize it. A few weeks ago an order from Elizabeth Studio finally got here and I wanted to use the 2 floral fabrics in a spring scene. (One was forget-me-nots and one was morning glories.)
This is what I came up with - I'm calling it "Spring Meadow" because I'm creative like that. (Snort).
This is what I came up with - I'm calling it "Spring Meadow" because I'm creative like that. (Snort).
 |
| Spring Meadow |
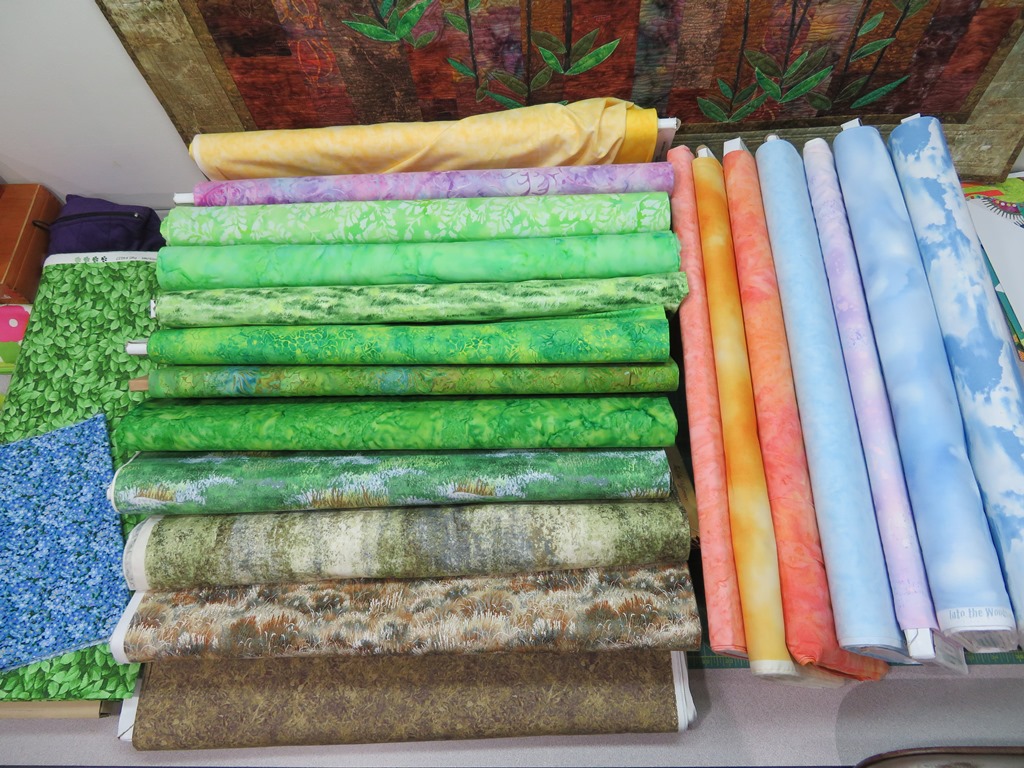 |
| I pulled some fabrics and figured out how to arrange them - |
If you know my quilts, you know that I usually choose some pretty colorful/intense fabrics when I'm making a stripped landscape. Well, I had a problem this time because those warm and beautiful apricots and oranges overwhelmed the blue forget-me-nots. I HAD to choose softer muted colors for the flowers to pop out. In other words, they disappeared when I started trying to put apricot/orange in the sky. I kept the flower fabric and the leaves I would use right next to my landscape as I designed it.
 |
| In progress - sorry about the shadows |
This is pretty much what I came up with. The muted soft colors in the sky make this pretty peaceful actually. I usually prefer to work with batiks using this technique because they don't unravel as easily. It's hard finding light soft batiks in sky blue colors though.
 |
| Strips are arranged and ready to be stitched down |
OH - in case you don't know what I'm doing, this is strip applique. It's taught in my book Lovely Landscape Quilts.
*Shameless Plug Warning*
Basically you arrange raw edge strips on a fusible foundation (Pellon EK130), slightly overlapping them as you go. Then fuse them in place. Because they are overlapped, only 1 raw edge remains per strip and these are stitched down using monofilament thread with a small zig zag. When the quilting is done you barely see the monofilament thread.
 |
| Adding a fence |
This rancher's wife has a small garden area looking out over their pastures. (The cows are in the upper pasture today.) To keep them out of her garden when her husband brings them down she had to put up a fence. I thought what the heck, why not make it a corner garden? Hence the rails go down on the right side.
 |
| Adding blue dahlias |
So, I like dahlias. What rancher man would try to grow them? Not one I would imagine, hence my invention of the rancher's wife. She doesn't have enough to do and the family has plenty of raw steak to stuff in the ground next to them.
(I think that is how you fertilize dahlias - right?)
(I think that is how you fertilize dahlias - right?)
 |
| Adding the morning glories |
I've always loved morning glories and the first few landscapes I ever made had them climbing up tree trunks and stumps. I'll have to include pics of them at the end of this blog - they are so old I wonder if I still have them somewhere. Hmm.
But I digress...
 |
| Just needed a bit of yellow |
If you look close, you can see the monofilament zig zag stitching.
 |
| All done - time to quilt I'm still not done quilting by the way. I'll finish that today or over the weekend and show you next time. Here are the promised quilts - boy they take me back to the old days when I pieced one square to another and hand quilted. These are my first original landscapes.  Tree of Life (It's a cross, too.) And the next quilt is Morning Glory - the quilt I made to express my love of the Grand Tetons. And... that's it for me this week!  |
First light is so pretty, just the right fabic colors.
ReplyDeleteThank you!
DeleteOh I love morning glories too. You have got the colours perfect.Did u applique them?
ReplyDeleteYep, fusible applique. The print came from Elizabeth Studios. (I have it for sale in my store.)
DeleteThanks for the compliments!