

 |
| I'm smiling because we haven't taken off yet, lol. The view from the air was beautiful but I spent a lot of time praying that I wouldn't throw up in his plane!! Ugh, I wish I had taken Dramamine! |
 |
| The view from the air - it is a beautiful little city nestled between mountains and the Pacific ocean. |
 |
| There were eagles everywhere we went. |
 |
| The Fireweed was in bloom |
 |
| This is the view from Fort Abercrombie on one side of the city. There were lots of wooded trails through old growth forests here. |
 |
| South of the city but still on the north side of the island is Pasagshak, these shots are from Fossil Beach. |

 |
| Hubby with the waves coming in. |
 |
| Green green hills and blue blue water - that's Kodiak when the sun comes out. |
 |
| Here I am with my friend Jacque. The weather was incredible, upper 70's for most of the week. We were blessed. The rain and fog came in the day we left and I guess that is the 'real' weather up there. We all enjoyed that short bit of summer! Well, back to my quilt. Here is how I made the large trees. I drew out my trees and branches and traced them on freezer paper. Then I got out my trusty Pellon EK 130 and used it for the foundation; I traced the rough outline of my freezer paper onto the foundation. |
 |
| Tree trunk and some of the branch patterns with the Pellon over the paper pattern. |
 |
| Next I laid out 3 strips of brown prints - medium to dark and steamed them to the foundation. All I had to do was the press that freezer paper pattern on top of the fused strips and cut out the tree. |
 |
| When I get the tree in it's final resting place I'll trim off the bottom so it goes behind the rocks. In the meantime I'm testing branch sizes and they look good. Before I do anything more though, I need to stitch down the edges of my strips. I use a small zig zag and the dark monofilament thread for this. |
 |
| I zig 3-4 threads into the print on the left, and zag into the ditch . |
 |
| Now for the FUN, I use markers to highlight, shade and blend. |
 |
| I use the black on the outside edge of the darkest brown - it will be the part of the tree to the right of the sunset/sunrise. I also use it to blend the lighter strips into the darker ones. |
 |
| I use the white marker from Galaxy to highlight the side of the tree closest to the sunset/sunrise. |
 |
| My big branch - uncolored. I just made the branches on Wonder Under - I didn't bother with the Pellon, the branches will get fused right on the quilt top. |
 |
| Here it is colored - I shaded the undersides using the black marker. |
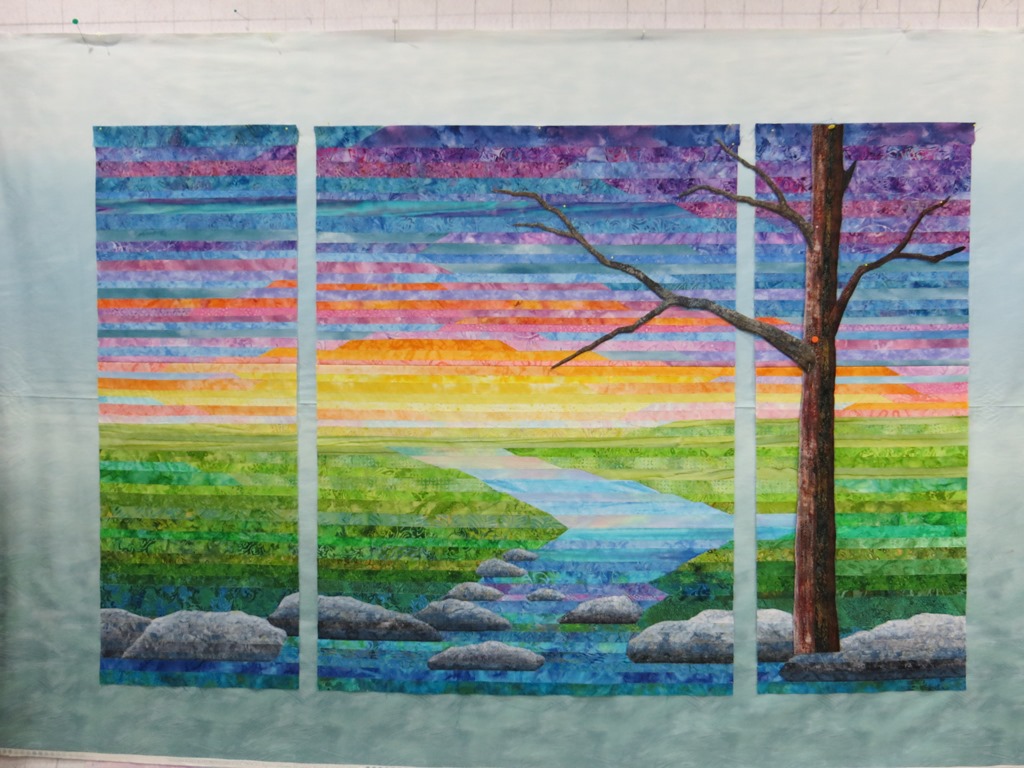 |
| The tree and branches - I like them! Everything in this quilt is made with straight strips, except the branches. Now to start on some of the background trees - this scene will either be early spring or late fall because I'm not planning on adding a lot of leaves. To start, I printed off some free clip art tree silhouettes then I traced them on AquaMelt - a water soluble stabilizer. I didn't want to thread paint/sketch the whole wider tree trunk so I cut a piece of fabric for the thick part of the trunk. What you see below is my layered thing. First layer is AquaMelt, then I put 3 layers of tulle with the tree trunk tucked in, and then the layer of AquaMelt which has the traced tree trunks on top. Incidentally, I used a blue wash out marker to trace the trees. |
 |
| Layers of tulle and AquaMelt |
 |
| I used black thread and stitched the traced tree - sort of. It was hard to see exactly where the branches were, but it didn't seem to matter much. Remember, that hollow looking trunk is really fabric... |
 |
| Rinsing and soaking in the sink - use hot water to dissolve the stabilizer. |
 |
| And there is my tree. It's too dark. Rats. Time to get out my trusty white marker! |
 |
| Much better! I won't use black thread next time. Now to make more and more of them! |
 |
| Closeup of the trees. I might have to do a bit more work on it come to think of it... maybe turn that white into a more golden color. Hmm. Well, that's if for me. It only took me 3 hours to make that tree - yuck! But it looks good and that's what counts. The hardest part was trimming off all the extra tulle - that was a pain. It's the first time I've made trees this way and I like it, now I have another tool to add to my landscape making repertoire. I hope you find it helpful to see how it's done! |
sometimes I'm able to just pull the tulle off around the thread painting rather than trim it.
ReplyDeleteHi Susan - have you tried this with just 2 layers of tulle? I'm thinking that might help, too. (Only pulling at 2 layers). Thanks!
DeleteYou have described everything in deeply way this is really informative article for improving skill of beginners.
ReplyDeleteThank you! I try to be helpful. :)
Delete